The 5-stage surf progression rubric for riding green waves

Claude

At Boston Surf Adventures, we use a structured 5-stage progression rubric to determine when a surfer is ready to leave broken whitewash and paddle into unbroken green waves. Transitioning to open wave faces requires precise paddle speed, instant pop-up mechanics, and active wave reading. Moving outside before mastering these fundamentals results in missed swells, nose-dives, and stalled muscle memory. By clearing distinct mechanical benchmarks at Nahant Beach—from explosive pop-ups to angled takeoffs—you build the control required to ride green wave shoulders with total confidence.
Stage 1: Whitewash mastery and the pop-up baseline
Most developing surfers paddle out to the main lineup far too early. They catch a few broken waves, stand up on an accidental straight line to the sand, and assume they are ready for the outside reef or sandbar. In reality, the foam is your laboratory. Whitewash provides continuous forward momentum that allows you to isolate and drill motor patterns without the risk of getting pitched over the falls.
According to data compiled on surfer development timelines, most beginners need between 5 and 10 dedicated sessions just to establish a consistent whitewash pop-up, whereas the transition to green waves typically spans sessions 10 through 30. Skipping that foundational volume creates technical flaws that become much harder to correct once wave speed doubles.
Before you consider paddling out back at a North Shore break, evaluate your foam performance against these baseline metrics:
- You catch eight out of ten targeted whitewash waves without instructor assistance.
- Your feet land in a functional stance on the centerline without conscious adjustment.
- You ride the board completely flat to the sand without falling sideways.
- You can step off into knee-deep water under total control at the end of the ride.
The explosive pop-up
The biggest technical flaw that sabotages green wave takeoffs is the climbing pop-up. In broken whitewash, a slow ascent works because the whitewater pushes the tail of the board continuously toward the beach. On an unbroken green wave, that sluggish movement causes instant failure. The wave lifts your tail, drops your nose, and pitches you down the face before your feet touch the deck.
An explosive pop-up requires a single, continuous push-up motion. Place your palms flat on the deck next to your lower ribs rather than gripping the rails. Push your chest upward while snapping your hips forward, bringing your dominant foot between your hands in one fluid movement. Your back foot should settle near the tail block, angled slightly outward. If you drag your knees or pause on your shins, you will not generate the speed needed to match an open wave face.
Weight distribution
Once your feet hit the deck, weight distribution determines whether your board plains or sinks. Beginner surfers often carry too much weight over the back foot out of fear of pearl-diving. Shifting weight onto the tail acts like a water brake, causing the board to stall and sink into the foam.
To create lift, center your hips directly over the stringer with roughly 60 percent of your weight pressed through your front foot. Keep your chest upright and your pelvis tucked. If you feel the board begin to decelerate, flex your front ankle forward to weight the front half of the board and accelerate out in front of the soup.

Stage 2: Board control and line of sight
Once you can stand reliably, the next diagnostic barrier is visual discipline and stance stability. Where your eyes point, your head travels, and your board follows. Surfers struggling to balance in broken water almost always make the mistake of looking down at their toes or watching the nose of their board.
Dropping your head shifts your center of gravity forward and breaks your spinal alignment. When your head tilts down, your hips kick back, forcing you into a rigid, unathletic posture. To fix this, fix your gaze on a stationary landmark on the beach, such as a lifeguard tower or a specific parked car, before you initiate your push-up. Keep your gaze pinned to that target through the entire ride.
Reviewing your posture through video feedback reveals these alignment breaks instantly. As explored in our breakdown on how video analysis fixes stance errors, catching yourself bending at the waist rather than compressing through the ankles and knees is the fastest way to stabilize your ride.
Check your body mechanics against these three physical checkpoints:
- Feet positioned shoulder-width apart across the stringer centerline.
- Knees compressed inward like a spring, absorbing chop rather than fighting it.
- Torso turned slightly forward, with both arms visible in your peripheral vision for balance.
Stage 3: Angling the takeoff in the foam
Riding straight toward the sand is acceptable for day one, but green wave surfing requires trimming across the open face. If you take off perpendicular to a green wave, you drop straight to the trough and get crushed by the descending lip. You must learn to set an edge while still practicing in broken water.
Angling the board begins before you push up. As the foam roll approaches, pivot your board 15 to 30 degrees toward your intended path—left or right—rather than pointing straight to shore. Paddle two firm strokes with your body angled, then initiate your pop-up while looking along that diagonal track.
Engaging your rails in the foam builds the exact muscle memory needed for open water:
- Look in the direction of the peel before popping up.
- Apply light pressure to the inside rail with your heels (backside) or toes (frontside).
- Keep your shoulders parallel to the angle of the wave face.
- Hold that diagonal line across the foam until the energy dissipates.
When you pressure the inside rail, the edge slices into the face of the wave, creating lateral drive. This movement separates true surfing from passive floating. Once you can consistently run a 45-degree angled path across whitewash without catching your outside rail, you have acquired the directional control needed for an unbroken face.
Stage 4: Identifying peaks and shoulders
Paddling into an open lineup without wave reading skills turns your session into an exhausting paddle workout. In the foam, waves are wide, uniform walls of white energy. In the green water, ocean swells have distinct architecture. To catch them efficiently, you must diagnose how each swell behaves before committing your energy.
As detailed in Surfolio's guide to transitioning out of whitewater, recognizing the distinction between a working peak and a closeout is the baseline skill for any surfer attempting to graduate from inside foam.
| Wave Section | Visual Appearance | Proper Surfer Action |
|---|---|---|
| Peak | The highest, steepest point of the incoming swell line | Position yourself just off the apex; paddle hard here |
| Shoulder | The sloping, unbroken wall tapering away from the peak | This is your ride path; angle your board toward this zone |
| Trough | The flat water at the base of the wave | Avoid dropping straight down into this area without a turn |
| Closeout | An unbroken line that pitches forward all at once | Pull back; do not waste paddle energy on these waves |
Finding the peak
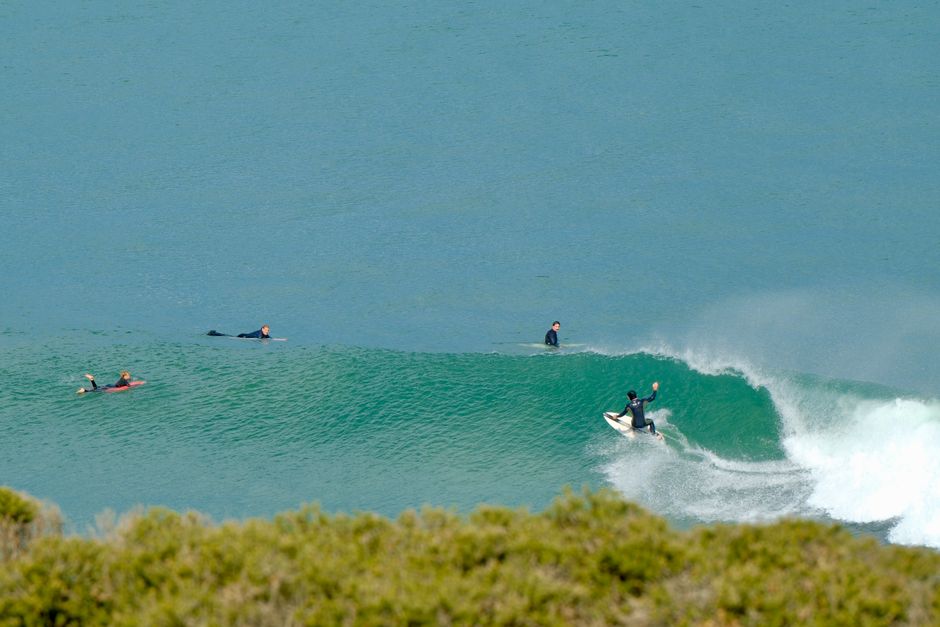
The peak is where the ocean swell hits shallow sand or reef first, pushing water upward into a distinct triangular apex. That high point is where the wave offers the steepest gradient and the highest gravitational energy. You do not want to sit directly under the falling lip; instead, sit two to three board lengths to the side of the peak where the swell is starting to pitch.
From this position, you catch the wave at its point of maximum slope without getting dropped vertically down a dry face. Watch the horizon lines closely as sets roll in. If a swell line is straight and level across the entire horizon, it will close out. If it has a distinct hump that tapers downward to the left or right, you have found a rideable peak.
Avoiding closeouts
Closeouts occur when a swell line hits a parallel sandbar and collapses entirely at once, creating a solid wall of whitewash with no open face. Paddling into closeouts will rattle your confidence and damage your gear. When you spot a swell line that shows no taper, sit up on your board and let it pass underneath you.
Save your paddle power for waves that exhibit a clear left or right shoulder. A right-hand wave breaks to the surfer's right (viewed from the board looking toward shore), while a left-hand wave breaks to the surfer's left. Choosing waves with peeling shoulders gives you an open canvas where you can trim and accelerate.
Stage 5: Timing the unbroken drop
The final stage of the rubric is synchronizing your paddle acceleration with the velocity of an unbroken wave. Whitewash hits your board from behind with brute force, meaning you can often catch it with minimal paddle effort. Green waves, however, pass directly under your board unless you generate enough forward speed to match the swell.
Timing the drop requires reading water movement under your chest:
- Identify the approaching swell 20 yards out and orient your board toward shore.
- Paddle smoothly to build early momentum before the swell reaches your tail.
- Dig deep, powerful strokes as the wave lifts your board, keeping your chin inches off the deck.
- Give two final acceleration strokes after you feel the wave pick up your tail.
- Execute your explosive pop-up the moment you feel gravity pull the board down the face.
Catching an unbroken swell is a game of repetitions. If you paddle out alone at an unfamiliar beach, you might only position yourself correctly for five waves across a two-hour session. When working with professional surf coaching, that efficiency multiplies dramatically. As we outline in our breakdown on the science of bypassing the beginner plateau, a coach positions you on the bank so you can catch 50 to 70 waves over a single weekend. That volume locks in timing that otherwise takes months to piece together on your own.
The green wave readiness rubric
Before you pack your board bag and head for deep water, run through this diagnostic rubric. If you cannot check off every item in the left column, spend your next three sessions drilling those specific deficits inside the waist-deep zone.
| Progression Stage | Whitewash Requirement | Green Wave Readiness Test |
|---|---|---|
| 1. Pop-Up Mechanics | Single push-up pop-up, zero knee-dragging | Lands in athletic stance on steep drops without pause |
| 2. Vision and Posture | Eyes looking toward shore target, bent knees | Eyes focused down the line, chest open to the beach |
| 3. Rail Control | Angles board 30 degrees left and right in foam | Holds trim on the high third of an open wave face |
| 4. Ocean Reading | Catches unassisted waves by reading incoming foam | Accurately identifies peaks versus closeouts 100% of sets |
| 5. Paddle Timing | Catches whitewash with three to four clean strokes | Matches swell velocity and drops in before the lip breaks |
Mastering these five stages changes how you interact with the ocean. Surfing stops feeling like a chaotic fight against water and starts feeling like calculated athletic progression. Build your foundation in the foam, verify your mechanics, and earn your place in the lineup.
To speed up your transition from broken foam to unbroken green waves under direct professional supervision, connect with the team through the Boston Surf Adventures homepage and explore our coastal coaching options at Nahant Beach.

